by: Tech21 | December 14, 2002
[Jump to: Tracking Hayamoto | Hidden Valley | At The Gates | Shogun Showdown]
 The three remaining Japan missions are basically one giant mission split
into three smaller levels. For this reason, you get the entire mission
briefing at the start of Hidden Valley and then seamlessly move into
At The Gates and finally, Shogun Showdown, where the actual mission goals
are accomplished. No denying it, Hidden Valley is the worst mission in
Hitman 2 - but hey, no game is perfect, right? Not only is the objective
to simply make it from one end of the level to the other, but that trek is
really, really frustrating, mainly due to a shoddy, not-very-thought-out design.
The three remaining Japan missions are basically one giant mission split
into three smaller levels. For this reason, you get the entire mission
briefing at the start of Hidden Valley and then seamlessly move into
At The Gates and finally, Shogun Showdown, where the actual mission goals
are accomplished. No denying it, Hidden Valley is the worst mission in
Hitman 2 - but hey, no game is perfect, right? Not only is the objective
to simply make it from one end of the level to the other, but that trek is
really, really frustrating, mainly due to a shoddy, not-very-thought-out design.
Here's the problem: the only way 47 is kept in check with a disguise is a
weird ID-check system where, when spotted, the guard will run up and check
your ID, then promptly begin shooting since you obviously have nothing of
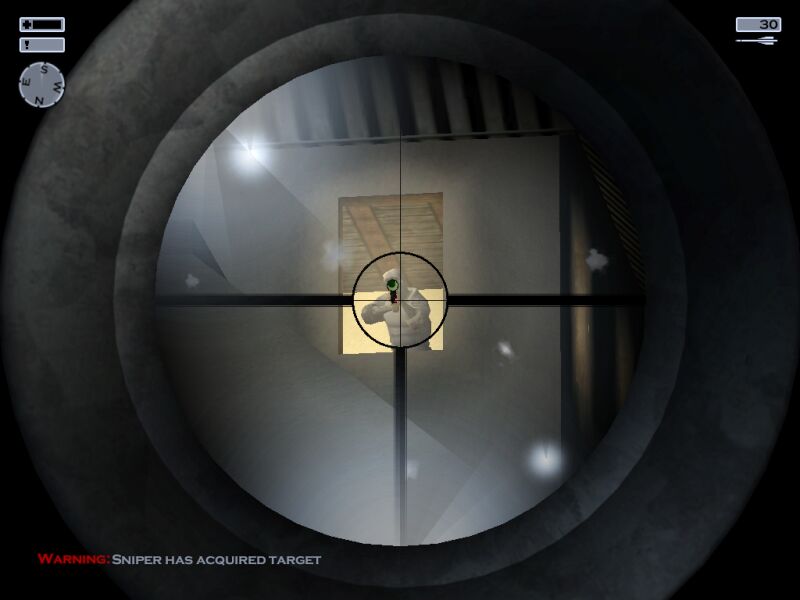
the sort. Adding to this, are snipers who can distinguish 47 disguised as a
ninja from a real ninja at 500 meters. So, to get through the level, you
either have to stay out of sight from start to finish, or blast your way
through as cleanly as possible. We'll be choosing the latter for this
walkthrough.
Load-Out
You get whatever carried over from Tracking Hayamoto, which is likely your
starting gear, plus the kitchen knife, SMG (if you decided to snatch it
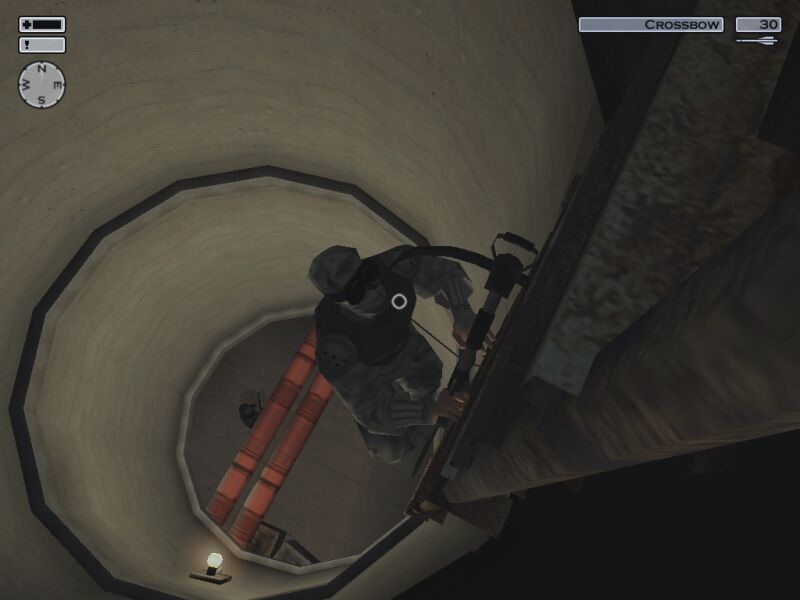
from the bedroom), and the bonus silenced Ballers. Agency's drop-off point is next to a truck parked behind
the initial tunnel entrance, where you can score a crossbow and 30 bolts,
plus nightvision goggles. The crossbow is important to carry on to the next
level, so make sure you hold onto it.
Walkthrough
 You begin the mission behind some trees facing southeast, looking at the main
tunnel entrance. The first goal is to make it to the Agency drop-off on the
backside of the tunnel entrance, but if you don't take a certain path, the
sniper directly south will spot you. So, turn and run due east, as close
to the mountainside as possible, and when you reach the edge of the trees,
turn due south and run right in line with the row of trees. Now just keep
going south from tree to tree, and when you reach the last tree, make a
beeline for cover behind the high wall of the tunnel entrance.
You begin the mission behind some trees facing southeast, looking at the main
tunnel entrance. The first goal is to make it to the Agency drop-off on the
backside of the tunnel entrance, but if you don't take a certain path, the
sniper directly south will spot you. So, turn and run due east, as close
to the mountainside as possible, and when you reach the edge of the trees,
turn due south and run right in line with the row of trees. Now just keep
going south from tree to tree, and when you reach the last tree, make a
beeline for cover behind the high wall of the tunnel entrance.
 You should now see the truck Diana mentioned in the briefing, but right around
the corner of the building is a single patrolling guard. Wait around the
corner, and when he begins walking away, follow him in sneak mode. Since
the guard walks really slow, you can overtake him in short while and use the
anesthetic to pacify him (five bottles is recommended; fiber wire is also an
option, but since you'll be killing later on, you might want to go non-lethal
on this one). Go ahead and take his clothes and then pick up the crossbow and
nightvision. Unfortunately the SMG-SD6 won't fit in 47's coat, so you'll
have to leave it behind. And don't worry about the body - no one will spot it.
You should now see the truck Diana mentioned in the briefing, but right around
the corner of the building is a single patrolling guard. Wait around the
corner, and when he begins walking away, follow him in sneak mode. Since
the guard walks really slow, you can overtake him in short while and use the
anesthetic to pacify him (five bottles is recommended; fiber wire is also an
option, but since you'll be killing later on, you might want to go non-lethal
on this one). Go ahead and take his clothes and then pick up the crossbow and
nightvision. Unfortunately the SMG-SD6 won't fit in 47's coat, so you'll
have to leave it behind. And don't worry about the body - no one will spot it.
 Now run south the nearby manhole entrance. As you climb down the ladder,
check the position of the guard patrolling that garage area. Notice that
there are two rooms connected to the garage bay, and the guard will enter
both of these on his patrol. If he is in the storage room below you or
about to enter the storage room below you, keep a distance up the ladder
so he won't spot you. When he enters the other storage room off the garage,
take this opportunity to run out through the garage and into the tunnel.
Now run south the nearby manhole entrance. As you climb down the ladder,
check the position of the guard patrolling that garage area. Notice that
there are two rooms connected to the garage bay, and the guard will enter
both of these on his patrol. If he is in the storage room below you or
about to enter the storage room below you, keep a distance up the ladder
so he won't spot you. When he enters the other storage room off the garage,
take this opportunity to run out through the garage and into the tunnel.
[Save Game]
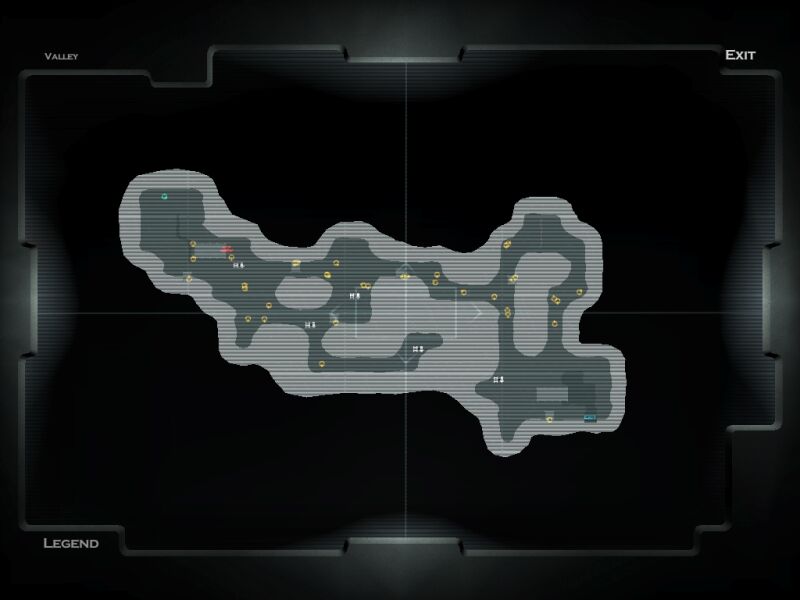
 Alright, the next goal is to make it to a vantage point some distance form
the midway checkpoint (on the map, it's where you see four guards stationed
in a square formation). To accomplish this, you have to make it past three
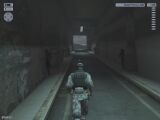
patrolling guards in the tunnel, which is really very simple. Usually all
three walk in one close group, and they always walk in a "slalom" pattern,
weaving between the center columns. So, head east down the tunnel, past the
first curve, and when the tunnel straightens again, position yourself behind
one of the columns, facing south. Wait for the patrolling guards, and
whatever side they take around the column, you take the opposite side. When
they pass, run down around the next curve.
Alright, the next goal is to make it to a vantage point some distance form
the midway checkpoint (on the map, it's where you see four guards stationed
in a square formation). To accomplish this, you have to make it past three
patrolling guards in the tunnel, which is really very simple. Usually all
three walk in one close group, and they always walk in a "slalom" pattern,
weaving between the center columns. So, head east down the tunnel, past the
first curve, and when the tunnel straightens again, position yourself behind
one of the columns, facing south. Wait for the patrolling guards, and
whatever side they take around the column, you take the opposite side. When
they pass, run down around the next curve.
 You are now facing east and can see the midway checkpoint in the distance.
Get to a position on the left side of the tunnel, directly adjacent and
one column past the garage bay on your right. At this spot you are just
out-of-sight of the guards at the checkpoint. Now, when a truck pulls up
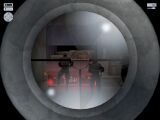
to the checkpoint, ready the crossbow and get ready for some sniping fun.
Two guards will come around to examine the rear of the truck. Crouching,
take them out with headshots. Once you kill the first guard, the others
will all come to investigate, so use the opportunity to easily pick off all four.
You are now facing east and can see the midway checkpoint in the distance.
Get to a position on the left side of the tunnel, directly adjacent and
one column past the garage bay on your right. At this spot you are just
out-of-sight of the guards at the checkpoint. Now, when a truck pulls up
to the checkpoint, ready the crossbow and get ready for some sniping fun.
Two guards will come around to examine the rear of the truck. Crouching,
take them out with headshots. Once you kill the first guard, the others
will all come to investigate, so use the opportunity to easily pick off all four.
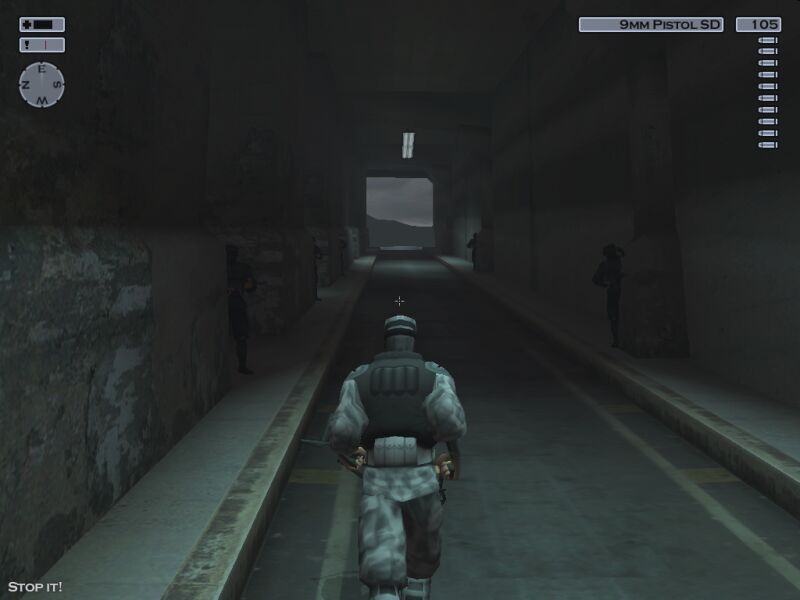
 After each of the four checkpoint guards is dead, run down the tunnel
and hop in the back of the stopped truck. In a few seconds it will begin
moving again. This truck will take you all the way to the exit. It
occasionally stops, but don't worry - you're already past the only
checkpoint! Sometimes a guard will spot you in the back, but he'll never
catch up, so it's nothing to worry about (only a "close encounter").
When the truck pulls out of the tunnel and stops, hop out and run to the
level exit.
After each of the four checkpoint guards is dead, run down the tunnel
and hop in the back of the stopped truck. In a few seconds it will begin
moving again. This truck will take you all the way to the exit. It
occasionally stops, but don't worry - you're already past the only
checkpoint! Sometimes a guard will spot you in the back, but he'll never
catch up, so it's nothing to worry about (only a "close encounter").
When the truck pulls out of the tunnel and stops, hop out and run to the
level exit.
 There are a few odds and ends to cover: first of all, sometimes the trucks
will run over guards at the tunnel entrance. These alerts do count against
your level stats. Now, if the truck happens to run over a guard at the
midway checkpoint, all trucks come to a halt and never move for the remainder
of the mission. In the case of this, either restart the mission, or just run
through the tunnel like a madman all the way to the exit - you may take a few
shots but you're guaranteed to make it rather easily.
There are a few odds and ends to cover: first of all, sometimes the trucks
will run over guards at the tunnel entrance. These alerts do count against
your level stats. Now, if the truck happens to run over a guard at the
midway checkpoint, all trucks come to a halt and never move for the remainder
of the mission. In the case of this, either restart the mission, or just run
through the tunnel like a madman all the way to the exit - you may take a few
shots but you're guaranteed to make it rather easily.
 Finally, if spotted by a guard in the tunnel before you make it into the
truck, either shoot him with the silenced 9mm as he checks your ID (which
could call for several other shootings in turn), or do the same as
above - just run for your life. If the above walkthrough works as planned,
you don't even need the disguise from the first guard, but it's good to
have as a safety net if spotted.
Finally, if spotted by a guard in the tunnel before you make it into the
truck, either shoot him with the silenced 9mm as he checks your ID (which
could call for several other shootings in turn), or do the same as
above - just run for your life. If the above walkthrough works as planned,
you don't even need the disguise from the first guard, but it's good to
have as a safety net if spotted.
Recommended Saves: 1
Rating: Professional
Time: 9:05
Items Available For Collection
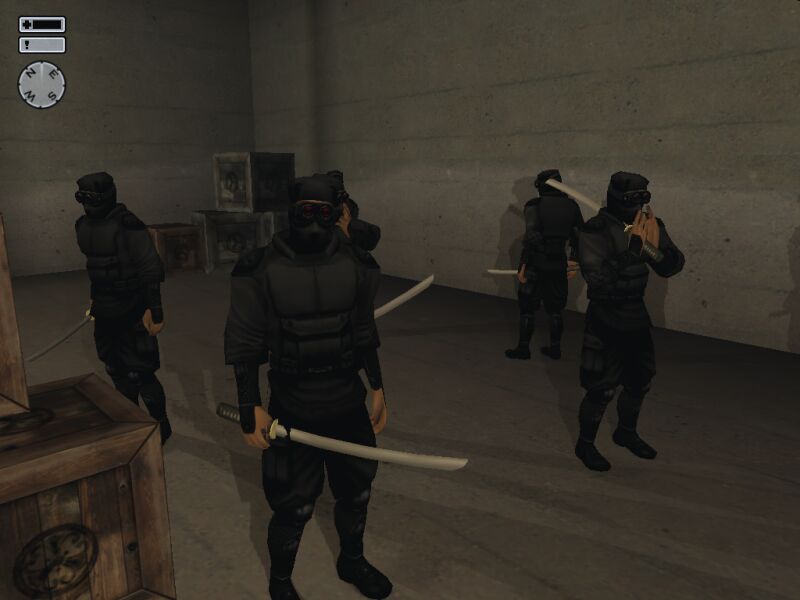
- SMG-SD6 [On Ninjas]
- Katana Sword [On Checkpoint Garage Ninjas]
- Crossbow [In Weapons Stash]
- Nightvision [In Weapons Stash]
- W2000 Custom Sniper Rifle [On Tower Snipers]
Points Of Interest
 Causing a ruckus at the checkpoint is not a good idea.
 Keep that gun in the window! Snipers can have slippery fingers, especially with a crossbow bolt in their forehead.