|
More to Mapping than Right Angles
Ever seen those really cool curved hallways? The ones where the walls were rounded perfectly and flowed together to create a seemless semi-circle? Ever wanted to make one? Well heck then let's do it!
There are two methods for doing this: the really easy way, and the more difficult way. The more difficult way has more possibilities and other applications, however. (And because I spent all that time writing it I'm not about to leave it out) We'll start with the really easy way.
The Easy Way
This method involves the 2d shape editor. In UndEd1 this can be accessed through Window>2d shape editor, in UndEd2 you simply click the "2d" button at the top of the screen. The two different versions operate in pretty much the same way, but the interface is quite different. I'll be using the UndEd2 version. After following this you should be able to use both versions with no problem.
Open up your 2d shape editor. You'll be greeted with a top-down view of a plain grid and a simple triangle shape in the center. While this *is* a top-down view, for this tutorial, think of it as a side view. It will make things much easier.
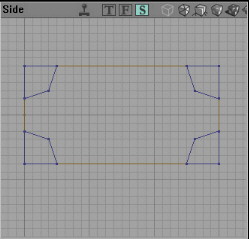
This triangle's kinda boring. Let's make something a little more complex. Select any two vertices (do this by clicking one, then holding ctrl, and click the next). Now right-click the line between the two vertices, and select Split Side (or hit ctrl-i). Hey, now we got a four-sided bugger. Repeat this until you have a eight-sided 'bugger.' After that, drag the vertices around (simple click and hold, don't need alt) until your bugger looks like this:
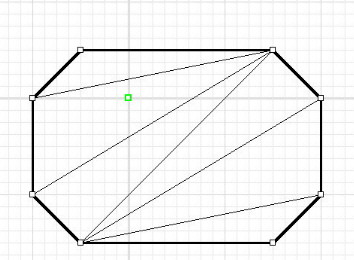
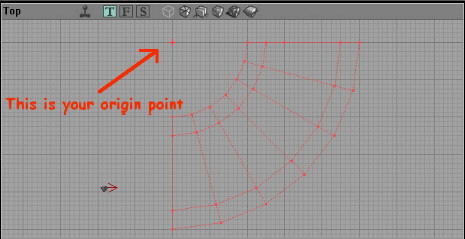
Now, see that green square? (crosshair if using UndEd1) Well, that's the 'origin.' I'll explain in a moment exactly what that does. For now, simply place it in the center of the brush, and then move it to the left so that it is 16 grid lines outside the brush.
Now, go up to Process and select Rotate. A small window will pop up.
Per 360: This means how many segments of your curved wall you want it to take to make up a complete circle. I recomend keeping it divisible by 8...16, 24, 32, etc...for right now make it 24.
Use: This is how many segments you want to actually create right now. For, make it 6. Hit ok and minimize the 2d shape editor.
You should now see in your viewports six segments making up a quarter-circle. (They'll be facing downwards, rotate them so they're flat) Now ain't that cool? A perfect, 90 degree quarter-circle. Awesome. Now I'll explain the origin point. This is the theoretical 'center' of the circle. So, putting it closer to the brush in the 2d shape editor would result in a sharper turn and smaller circle, while moving it further out would be just the opposite.
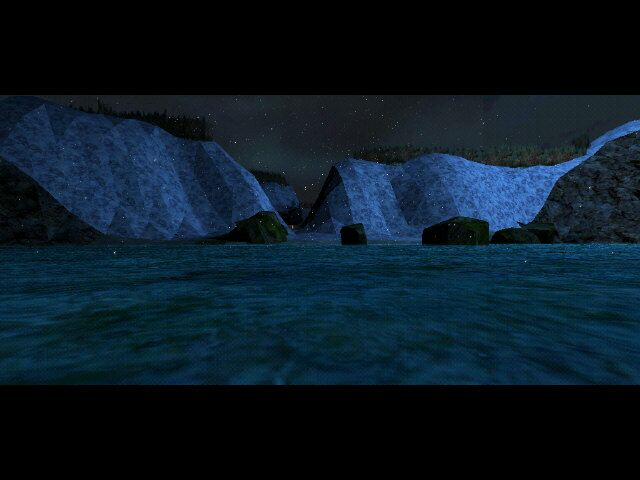
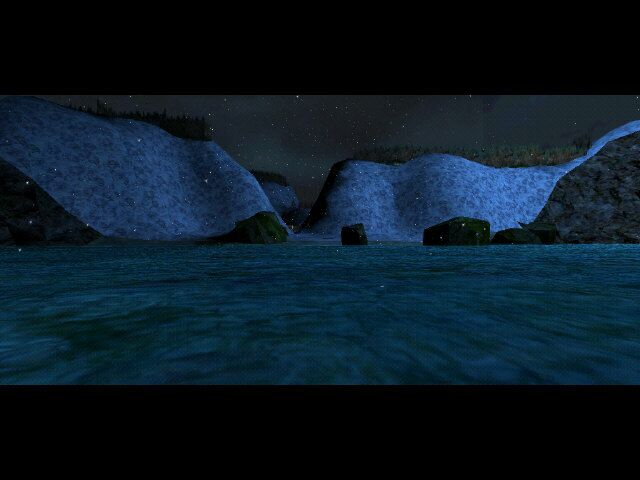
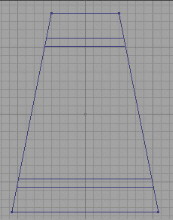
Another thing I'd like to mention is gouraud shading, which helps give the curved surfaces an even more smooth look. Select all the surfaces of the curve and check the 'Gourad' tag in their properties. When you play the map you'll notice a much smoother curving effect. Thanks go out to Keebler for this great tip. Here's an example of the difference gouraud shading can make:
Without
With
The Hard Way
This method involves vertex snapping. You know how sometimes when you're moving a vertex it wants to stick to this *one* point, and no matter what you do you can't get it where you want it without turning vertex snapping off? Well, in this case, vertex snapping is your best friend.
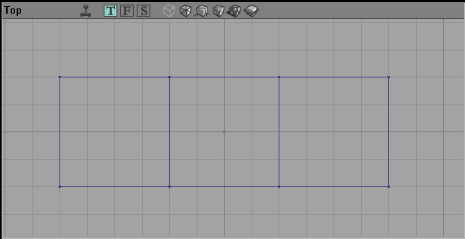
Let's get down to business. Make yourself a big room, 1024x1024x1024 will do. Don't worry about texturing it; this is our 'play' room. Now make a small addition brush inside, 64x64x64. Duplicate this brush twice, so you have three 64x64x64 blocks all adjacent to each other, like this:
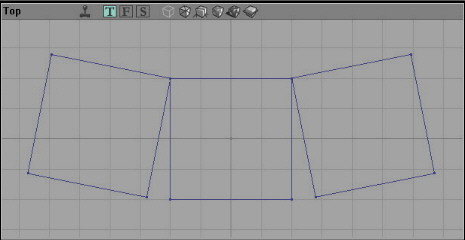
Now select the brush on the left so that it's highlighted. You'll see that little pink crosshair in the center. This is the pivot point of the brush; if you rotate the brush, it will rotate about this point. But we don't want to rotate the brush around the center, so let's move it. While the brush is still highlighted, click the upper-right corner of it. The crosshair should move to the small dot at the corner of the brush. We got ourselves a new pivot point, and can now rotate it the way we want it. Hold down the ctrl button and click and hold the right mouse button, and drag the mouse to the left until the brush has rotated two 'clicks' to the left. Mirror this procedure on the right-most brush and you should have something that looks like this:
Now what you want to do is 'strecth' the bottom vertices of the center brush so that they match up with with the bottom vertices of the two side brushes. G'head, try it. Select the center brush, and then select the bottom left vertex by clicking it (the little dot). The pink crosshair should be on it now. Hold down the alt button, and click and hold the left mouse button on the pink crosshair. Drag the vertex over to the bottom right vertex of the left-most brush. Hmm, what's this? It won't match up. Turn the grid down and try again. What? Still doesn't match does it? Even with the grid at 1? Heh, here's where the beauty of vertex snapping comes in.
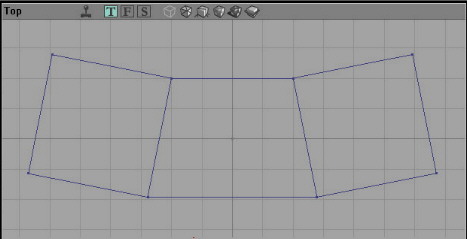
Hit F8 and rebuild, so the editor 'knows' the current location of the brushes (since you rotated them). Now try dragging that same vertex over again. Wow, it snaps right onto the bottom right vertex of the left brush! Cool! Do this a second time (as there are two bottom left vertices; the upper and the lower) Again, mirror this procedure on the other side. Should look like this:
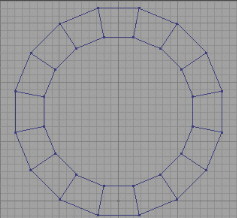
Now delete the left and right brushes, leaving only the center 64x64x64 brush with the now sloped sides. Duplicate it. With the new duplicate highlighted, select the upper right vertex. Move the brush so that this vertex macthes up to the upper left vertex of the original brush. Now, rotate it to the left so that the two brushes match up perfectly along the side. If it won't rotate to the right spot, hit F8 and rebuild first, then try again. Once more, mirror this procedure on the other side. Continue duplicating and rotating the brushes (remember you'll have to rebuild each time) until you have a complete circle. Like this:
Well...that's neat. It's kinda cool...a curved wall in a complete circle...but...what can you do with it? Well...let's try something. Make a builder brush large enough to encompass the entire circle, and hit intersect. Move the builder brush Away from the circle, and add it in. Hey, neat...another circle. You could move the builder brush outside the 'play room' and subtract it, but it would be much to small to put the player in...and really, what have we done here that you couldn't have done a lot faster (and easier) by just making a hollow cylinder? Well, this was just an excercise to get you used to what you need to do =) On to the Real Thing!
Delete everything in the 'play room' or start a new map, whichever you feel's easier. We're gonna get fancy now.
Make yourself a new subtraction brush outside the play room, 192x384x256. Put some trim or something in the corners. I made mine up like this:
Next, make a large builder brush completely encompassing it, and hit de-intersect. Your new builder brush might look a bit whacky, having a bunch of new vertices in odd places. This is no biggy, this'll all be fixed in a bit. Take the builder brush over to the play room and add it in. Add in two more (or duplicate the first) so that you have three adjacent to each other, just like with the three 64x64x64 brushes you had.
Select the left brush and rotate it out two 'clicks,' just as you did earlier, again mirroring the same on the right brush. Rebuild. Now you gotta drag all the vertices of the center brush over to match the sides of the left and right brush...but there's a bunch of 'em, and in odd places! No matter, they'll snap to where they need to be just the same. Just a little extra vertex dragging is all =)
When you're done, delete the left and right brushes, and you should have something that looks like this:
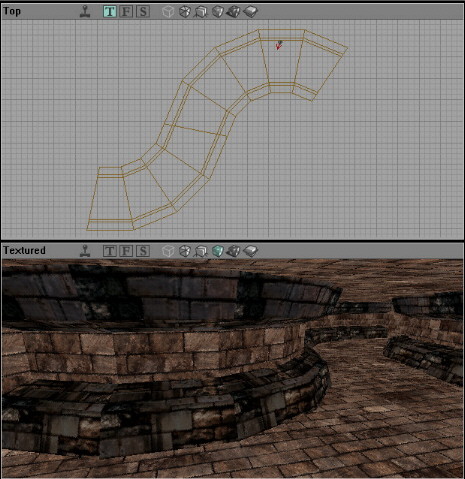
Rebuild. Again make a builder brush large enough to contain this center brush. Intersect. Take the builder brush outside of the play room and subtract it. Doesn't look like much, eh? Make another one then! As you did before, take the second brush and move it so it's upper-left corner matches up with upper-right corner of the first brush. Rotate it so it matches up perfectly along the side, rebuilding if need be. Keep doing this as much as you want. You can even rotate the brushes 180 degrees so that the curve starts going the other direction if you want, giving you a snake-like hallway. When you have it how you like it, make one huge builder brush large enough to contain the entire thing. De-intersect. You should now have a smooth builder brush, (fairly) free of any odd vertices. Plop this thing around where ever you want your hallway, subtract, and voila!
This is just the basics, obviously. Feel free to experiment with it. Try different brush lengths or more rotation 'clicks' to achieve different degrees of turns, more elaborate trimming to make perfectly round 'tube' hallways, etc. Good luck and have fun! I hope to see some nifty curving techniques in upcoming maps.
-Hobbes
|