
Starfleet Universe
Current
News
Old
News
Interviews
Articles
Downloads
Tutorials
Staff
SFC Community
SFU
Forums
Links
Modder
Policies
Nightsoft
STGU
SFC Volume III
Press
Coverage
Ship Profiles
Screenshots
Model Installation
SFC Orion Pirates
(SFC2:OP)
Picture
Gallery
Mods
Installation
SFC Volume II
(SFC2:EAW)
SFC2
Dev. Diary
Picture
Gallery
Online
Gaming FAQ
Interface
SFC Volume I
YnrohKeeg's
Tactics
Mission
Reviews
Game Information
Music
Gallery
Picture
Gallery
Hosted Sites
Newships Project
Omega Sector
Fleet Dock 13
SFC Briefing
Vulcan Yards
Get Hosted!


Link Back to Us!
|
|
Starfleet Command: Milkshape Texturing |
This is a step by step
guide for texturing a starship model when modelling in Milkshape.
For more information about Exporting a Milkshape Model to SFC, please
visit SFU's Download section.
By James
Formo
Step 1
 |
|
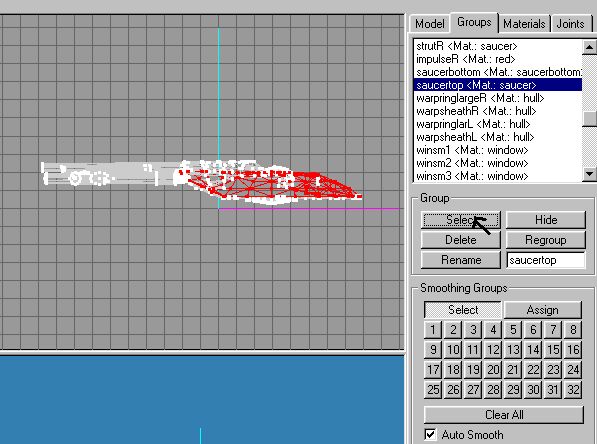
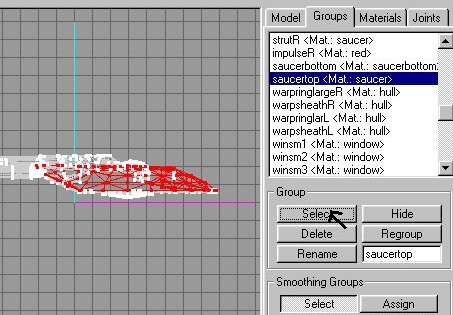
Click on the Groups
tab.
Scroll down to find
the group you want to assign textures to, highlight it (in this
case I am assigning saucertop to a bitmap) then click Select.
The group is now selected,
as you can tell by the red vertexes.
|
Step
2
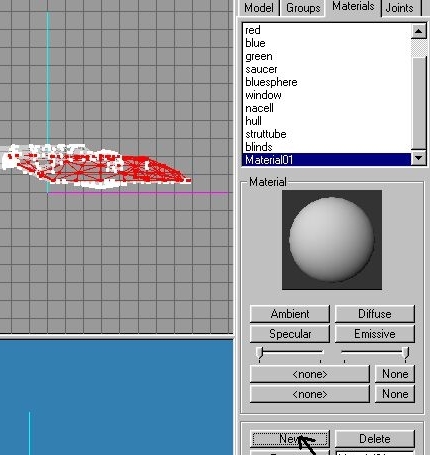 |
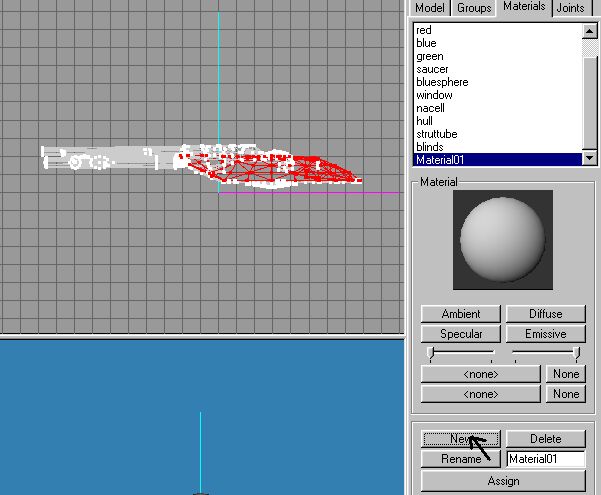
| With the group still
selected, Click on the Materials tab. Click the New button. |
Step 3
 |
|
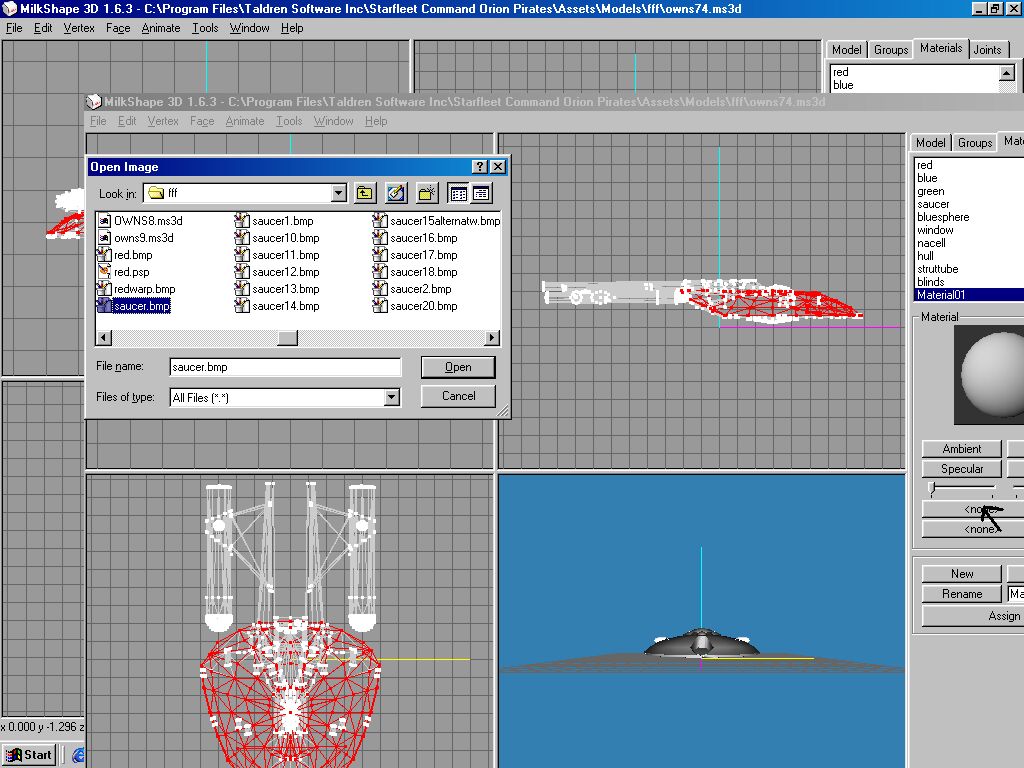
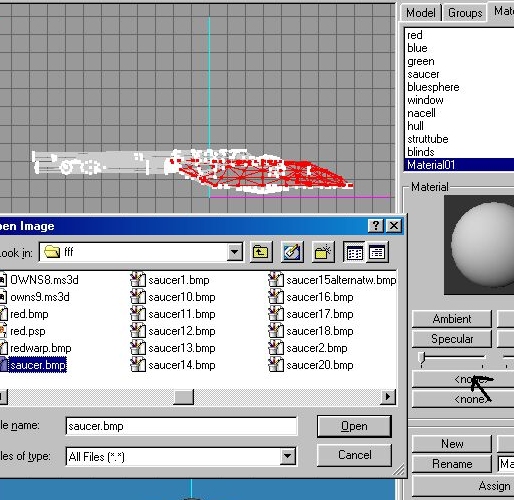
Click the top <none>
button to open a window that allows you to select the texture
you will assign.
Select texture (in
this case, the file named saucer.bmp) and Open the
bitmap.
|
Step 4
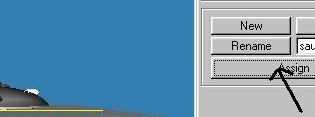 |
| Still under Materials
tab. Click Assign. |
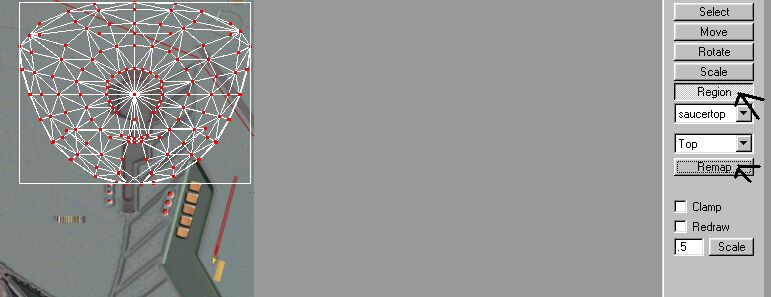
Step 5
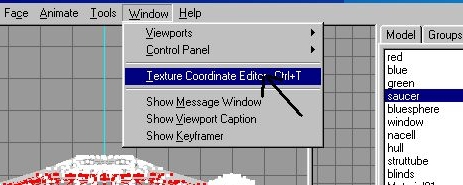 |
| Open the Texture
Coordinate Editor (TCE). Your group (saucertop) must
still be selected. |
Step
6
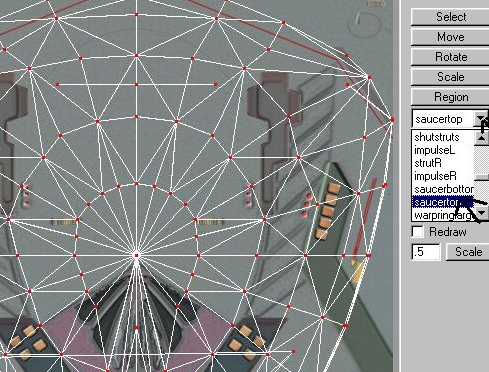 |
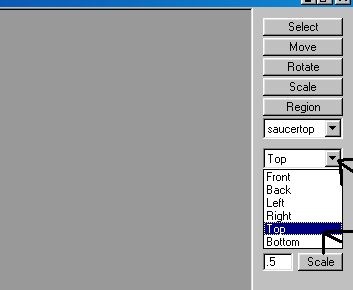
| In TCE under the top
drop down box. Select your group. (saucertop for this example) |
Step 7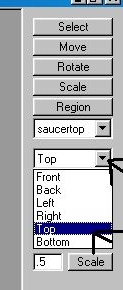
Under bottom drop-down box,
select the view to assigned texture. In this case Top works best.
This will map the texture
to the group using the entire bitmap
Step 8
OPTIONAL.
You can assign a group to
just part of a bitmap by clicking Region, then select a portion
of the map using your mouse.
Click Remap and the
saucer is assigned to the upper right corner in this example.
|