| Campaign
Intro. |
| Note:This is a review of an old version of the campaign. There is a much newer version available for download at Steve Browns Campaign page, which have been highly changed. |
Score: 7.5 out of 10
Supreme Campaign by Steve Brown. It would be a pure masterpiece if it was not for that Operation Lightfoot scenario. Sad sad ending to a very good campaign. It only gets 7.5 because of Lightfoot, with a better Lightfoot scenario it would have gotten 8.5. Right up to Lightfoot this is the best campaign I have ever seen. It should be tried by anybody that really want a good and very fair (except that one scenario) challenge. Newbies may find it to hard. Prestige is managed very very well, the best I have ever seen. You cannot build a huge army, nor can you upgrade to the best equipment always. You have the make a choose about to upgrade, buy new or overstrenght every scenario. Replacement during a scenario should NEVER be done, then you simply wont have any prestige between scenarios. Note: if you play this with the WaffenKammer v3.0 equipment file, its slightly easier, as some of the long range arties had been decreased.
[Story]. This campaign consists of battles by British Commonwealth and other Allied forces in the Western Desert from 1940 to 1942 against the Italian and German armies. The campaign begins in December 1940 (Operation Compass) and continues until the conclusion of the Second Battle of El Alamein in November 1942 (Operations Lightfoot and Supercharge).
This campaign contains units from Australia, France, Germany, Greece, India, Italy, New Zealand, Poland, South Africa, UK and USA and consists of 16 battles fought over a period of 2 years and is not linear, although brilliant victories will get you through all the battles. It may seem odd that you get pushed back to El Alamein after a series of brilliant victories, but I want to follow a strict historical timelime - this is MY campaign after all. A list of battles is at the end of this file.
| When I played it. (Lasse Jensen) |
I played version: Version 1.10, with WaffenKammer equipment file v2.61, at 100% prestige modifier.
This is an awesome campaign. Very very enjoyable, and offers lots of thinking time. Rushing into things will get you nowhere.
It start out with Operation Compass. Which is a very fine scenario. By the final victory hexes, there is a bunker complex. You will have a large (relative speaking) army trying to get though a narrow path, all your units standing in the way of each other while trying to avoid enemy arty fire, and get your own Arty in place - while the Italians are making hit and run attacks on you - love it :) I did a 2 turn before BV.
Attacking Tobruk. Awesome scenario, very very tough. The scenario is made for you to spilt your forces. In the start of the scenario most of your units is committed to taking Tobruk. Tobruk can be hard to take. Those Bunker Arty, and Pak bunker, will do some damage to you. Especial that Pak bunker, lot of my men bleeded to death outside that one. I actual had a graveyard build there after the battle :). Anyway, you got to know the exact right moment to redraw troops from the Tobruk battle to take that new victory hex that pops up, to the west, during the scenario. If you do it to late, you cannot make it in time. To early and you wont have enough force to take Tobruk. Dissuasion time. The Air fight was also very interesting. I had only one fighter, a Hurricane. I also had a range 2, 20mm AA, aux gun. The Italians had 2 biplane fighters and a bomber. After many many turns I finally got them down, but not before they had taken lost of points on my units. My fighter earned an increatable 211 experience point !!!!!!!, but he was now down to 3 strength points left. After a while another 3 fighters came. I went into battle ones with my hurricane, which got him down to 1 point left, then he ran home. You can imagine that the Italian air force has a field day on my units. I used the trick of providing a better target for the AI to save a badly hurt unit. With 2 turns to BV , I was setting up my forces outside the last victory hex. Last turn, I shoot all arty at the victory hex rather then attacking some arty I could see. Heading dead on with 2 Inf, that got badly shoot up by his arty, but manage to force the Italian Inf to retreat, I then discovered I had no units that could take the hex. So I only got a victory here .
Beda Fomm, Easy, with some tough battles, but super fun. I got the upper victory hex fast and easy, but then large number of Italian show it self, and I was in for a tough battle. As that was not enough, 2 elite Inf Battalions show itself, and a leader 4 range Arty (now a 5-range!). Nothing more devastating then to have the enemy arty outshoot you! I used my tough Crusader and matilta tank to get it to use up all it ammo (not before it got some shoot at my arty), that way it will be constant out of ammo, as it cannot resupply full in the desert (a little tip here). After some turns it was clear I could not hold it for much longer, and a time race began. So I stormed down to take the last victory hex at the bottom left. And got it I time. Before the scenario start I brought a AA gun, the best I could get. This UK AA actual outperformed the German 88. Very expensive, but I learned my lesson in the previous scenario. With one fighter (still Hurricane) and a mean AA I entered the scenario. It paid out right away. You cannot deploy your figher(s) before you take the Airfield. Those little nice looking Italian biplanes came storming my Arty, but was met by a storm of AA shells. Again after server air fighting, my hurricane was down to 2 points left (another 129 points), and I retreated it out of the battle. But this time the Italian air force did not have total freedom, because of my devastating AA. Good investment :) Did a 4 turn before BV.
Mersa el Brega, now this is what scenarios should be like. Fan-f***ing-tastic. This is a Hard defensive scenario. You are racing down to Mersa, to prevent the Germans/Italians to take the last victory hexes. I thought I was doing pretty good the first couple of turns. I had equip all my units (Inf, Arty, AA) with Bren APC's, so I was down there quick (another very good investment in the desert). Since most my units got down there so fast (and it is needed that they do), almost all got trapped, when the Germans made a encircle movement. 2 tanks and a recon was littering fighting to hold the line of retreat open. This is when you really start to care about your units. At one point, I leaned back in the chair, and said to my self, god damn - you can lose your entire army right here in the 4th scenario!!!. I seriously though about retreating every thing, just to get out alive. Let the Germans have those hexes, and still have my army. Then again no way that some dumb AI should beat me at my game. So I rallied everything, gave them a speech and told then to hold out with utmost resistant. They fought hard and brave, and I finally got the upper hand. I calculate my mean strength point reaming, it came down to 4!! - I had 6 units with ONE point left (3 tanks, 1 Inf, 1 Art and my hurricane). I never had my army depleted so much, and I mean my whole army. There was virtual nothing that could fight anymore. With one turn left to victory (no way you are going to get a BV here), I got greedy. I saw an chance to snap his supply hex, so I did that instead of a victory (more prestige). Got a Tactical victory.
Defending Tobruk, even though I made a pretty good stand there at, Mersa el Brega, the Supreme commander insisted on pulling back to Tobruk, and there will be no retreat this time he said. Ok fine with me, I am going to show those German basters how this game is played. This is also a tough scenario, not as Mersa el Berga, but ok. The Germans are a little to weak to really pose a serious threat, though those 6 range arty WILL hurt you plenty. Ones again those Axis are out shooting me, even though I have 3 arty leaders now. It took some strength point of mine to get rite of those 3 arty in the city. The air force posed no threat at all, as I got help from 2 other hurricanes. Did a last turn BV.
Operation Brevity. This was an experience I could have lived without :). Tough, tough, tough scenario. Mostly because I did it all wrong I believe. You have 3 victory hexes, and you just need to take anyone of them to win. As usually I started out on a relative long front line. Made quick progress to the right, but was halted by a bunker complex, and those long-range German Arty. In the middle/left I also made quick progress, destroying the first German battle group I encountered. Bypassed those towed AT of the group (no need to fight some AT in the middle of the desert, for no reason). Then I ran into a solid wall of AT (7.5 Pak - range 2 and 88's), covered by those damn 5-6-7-range arties. His air force ranged almost freely. You cannot deploy you air force, as you own no Airport. So I only had my one AD, and a aux hurricane (a hurricane and a bomber arrive some turns later). With AT, Arty and bomber hammering my forces, they quickly lost there strength. Desperate situations require desperate measures. So I decide, to retreat all badly hurt units out of the battle, combine all reaming force for a wide sweep around the most left victory hex. I fought hard and long but in the end, my force was too weak, and the Germans got the upper hand. I Gave up and ran for my life. I believe the sweep around the left was they right way, but I did it to late. I got beaten fair and squire by the Germans (damn AI) and required a loss :(
Operation Crusader, well much wiser, they first thing I did before the scenario started, was to buy a AD gun more (there goes half my prestige). My force consisted now of 5 tanks (1x Matilda II, 1x Cruiser I, 3x Cruiser V), 5 Arty (5x 5.5Inch), 2 Recon (2x Daimler scout) 5 Inf (2x Paratroopers, 3x Engineer), 2 Air Defense (2x 3.7Inch) and 1 Fighter (1x Hurricane IA). Mighty little force some would say, but they were well experienced. Having 3 tanks leaders (ComSup, AggAtt, RecMov), 3 Arty leader (StrFig, DetDef, SkilRec), 1 Inf leader (Brig), 1 AD leader (AggAtt) and my fighter had a leader (SupMan). This is super super super super... scenario. You got 5 victory hexes to take. I split my force in 4 battle groups, you have a large amount of aux units, so it can be done. One small group helping the aux troops at Tobruk, and in taking "Belhamed" and "Gambut". Another small group heading directly across the desert to help in taking those hexes. A larger group taking the long road to "Gabr Seleh" and "Sidi Rezegh", possible getting help from the Tobruk group or the other way around, depending on which is harder to take. Final the biggest group smashing its way though the "Bardia" and "Sollum" region. Good plan I thought. The desert group made fast progress with out a single opponent and sweep directly in his rear, causing havoc among his arties and supporting units. With a outbreak of Tobruk at the same time, the German line all feel down. Ohh it was simply beautiful. Textbook exempla on how it should be done. The "Sidi Rezegh" group also made quick progress, and even before they reach "Sidi Rezegh", I had already Tobruk units coming down to help. I also got reinforcement from the south. So the object was relative easy taken, despite the fact he kept buying reinforcement, and some Italian Arties arrived as reinforcements. The large group at "Sollum" had a somewhat harder time. "Halfaya Pass" prove to be such a difficult hex to take, that I sweep around the whole thing, leaving 2 Inf and 2 arty to battle it out. I original had the idea of taken "Bardia" also (you don't need it, but its a supply hex, - good prestige), but abandon that when I was faced with two awesome 88's and a 3rd in the Sollum area. There was one annoying thing that happened in this scenario. As I sweep around "Bardia" and "Sollum" I got a quick advance to the victory hex in the north, and suddenly (in turn 7 I believe) huge number of German reinforcement arrived right in the middle of my forces. So with both mine and his forces trapped within each other I lost a good arty and Inf :(. Then the pot really got cocking. German and Italians reinforcement popup everywhere. A HUGE number just outside "Sollum", and suddenly I found ME in process of losing the game, cause they were endangering MY victory hexes. I had to buy a Inf to protect the right most hex. Luckily I my self got reinforcement in the southeast, they raced up to intercept them. A fearsome battle followed, where I scarified large number of aux troops, to buy time for me to take that last victory hex. Also huge number of enemy aircraft popup, and the air-fight began all over again. I tell you there was fighting everywhere on the map. Frontlines was not visible anymore. Its hard to describe it, you got to try it for your self. Did a 4 turn before BV, only because I pushed hard to get the last one, before they got mine. He actual managed to take one of them, but I hit on him, regardless of losses, till he retreated. Got my first prototype a Humber IV recon.
Operation Venezia, I gave in and upgraded my Hurricane to a Spitfire VB, also upgraded the Matilda II to a Valentine VIII, and the Cruiser I to a Grant. The rest was unchanged. That was that prestige :( My Spitfire VB is my most experienced unit with 757 experience point in 7 scenarios. Very good I believe. My 5 tanks has from 517 to 683. Arties range from 203 to 417. Inf from 409 to 589 and the one I brought during the last scenario has 91. This is ones again a defensive scenario (love them). You have to spilt you forces, and placing them the right way is very importuned. Since I am building a Afrikakorps campaign myself, I had a good idea where the German would come. Its a little fast scenario (though many units are involved), with not many turns. No digging here, you constant got to counterattack to keep the upper hand. One again I was reminded that keeping an eye on every units supply situation is very importuned in the desert. I ran out of steam one turn before BV, and ended only with a victory here.
Operation Aberdeen, a little scenario, simulate to operation Venezia. Upgraded 2 Cruiser V to Sherman I. You have 3 victory hexes that you have to hold while trying to taking one your self. The upper left is easy hold. The bottom left is also farley easy. You can see 2 arties, DON'T venture out and attack them, they are covert by an addition 3, 6-range arties!!! - I did a probe with a aux Grant, and gone he was. Let those 2 arties shoot at you, and just defend your self. I placed a 5.5inch, with leader behind the hex, to shoot at them, to keep them down. Doing it this way they wont do much damage to you. Now they middle victory hex is another story. The Germans and Italians will attack you fiercely. Luckily I had a tough 2pound AT gun sitting on the hex from the beginning. He survived 2 turn, while every other aux unit was crumbling around him. Good good gun :). Then my units came to aid him. Then some stupid Italian M13/40, even though he had 500 experience point, attack my 250 point 3.7inch AD gun - HAHAHAHAHAHAHAHAHAHAHAHAHAHA - the 3.7inch gun has a hard attack of 23!!!. By the victory hex I had to take, I smashes my way though with 3 tanks, 2 Inf and 2 arties in 3 turns. Did a 3 turns before BV. Got my second prototype here, - a Daimler CS recon.
Withdrawal from the Gazala Line, tough scenario. I sold my Daimler CS, and got a good price for it, 250 or so. So I now had 467 prestige :(. Upgraded my last Cruiser V to Sherman I. Overstrenght 2 tanks - out of prestige :(. This is not really a fair scenario, cause you cannot get a BV I believe. If you do get a BV, you might as well go over and get lotto coupons right away, cause this is your day. The left most hex will be overrun with in the first 2 turns. Just get out of there with as many aux units as possible. By the bottom mid hex a fearsome battle can/will go one. I believe you can hold it, though I could not. It changed side 3 times. I was a little afraid cause for the first time I was meeting the dangerous StugIII AT gun. And seeing how a 88 AT can spilt my tanks in half, I was afraid I would have a very hard time with these babies. As it turned out they did not have enough experience to match my Sherman's. By the airport hex, I deployed my forces and within 2 turns the attack was all dead. So I headed over to help out at the 2 critical hexes. On the top my forces smashed every opponent in 2 turns. 2 units held the hex, the rest went to help at the bottom. Some of then ran into two Pz IV reinforcement, and was stalled that way. Even though I did everything possible to retake the left most hex, losing aux units at a 1-1 rate, and avoiding combat when I could, I could not get the hex within a BV. The distain is physical to long for the turns you have. The only way I can see that you can get a BV is to hold the 2 endangered hexes for 2 turns and take the upper hex in the same time. Got a last turn victory.
First Battle of El Alamein, Middle scenario. Seeing the 2 arties outside El Alamien, I abandon it right away. No need to lose aux troops for a battle that cannot be won. I deployed them 6-7 hex behind. I deploy my core troops in the middle of the map. Standing still for 2 turns waiting for the approaching axis armor, that I was sure would come. And they did come, 4 turns of counter (hit and retreat) attack, they were all gone in the middle and top. Then I went on the attack. I had to divert some troops to the south, as the axis launch a major assault on my bottom south victory hex. My aux troops there did a fantastic job, so they never got it, and when my core troops arrived it was all over for them. Somehow I must do things that designer never dreamed of, cause ones again German reinforcement arrived right in the middle of my force proceeding south. They were dealt with swift (a tough Pz IVF2 - range 2, was among them, he was a very hard bargen), but its kind of irritating. Did a last turn BV.
Alam Halfa, nice battle. Not to difficult. I deployed my best 3 tank and 3 arties around Halfa. This is where the main attack of the Germans arrive. Your troops way down to the south will be slaughtered if they stay, and the will also be slaughter if they run. Anyway they die, so used them to draw the enemy away from the victory hexes. It very imported that you stay focused, don't fight with troops you don't have to, or else this can turn into a very hard battle. So leave that dual arty and extremely hard hitting AT to the north alone. Then they will not due you any damage. I destroyed the 2 tanks to the north quick, sweep around the Arty and AT nest south of El Alamein, and continued strait to the victory hex in the middle of the map (this is my hex at the start of the scenario). My force at Halfa, stood still an awaited the onslaught. They came but was not powerful enough. Though some of the German tanks have quite a lot of experience, I still have the upper hand. Of course even my tanks don't like the range 2, Pz IVF2. Did a 2 turn before BV. Got a Bomber prototype TLC, which I sold right away, and got a nice 700 prestige :)))
Operation Lightfoot, not practically good nor fun scenario. Actual I think its a very sad second last scenario (which became my end) to a very good campaign. The General said that you have the upper hand in every way - and he is lying directly to you face. You are highly outnumbered and more imported outgunned to the extreme, which in reality would have been the other way around. There is a minefield running from north to south the whole map, with only 3-4 one-hex wholes. There is no outflanking or moving around them, you have to go though them. These whole are guarded so extremely. Those 6-7 range German Arty are everywhere, all graded by 1 or more AD gun. You cant fly in and suppress just a little, you can't reach them with arty, so every time you make any attack you will be shot at be 2-3-4-5-6 arty pieces. Impossible odds. As if that's not enough there are a 1000 or so high experience range 2 AT gun blocking every approach you can think off. Get real!!! - if the German process such a awesome army, why the hell are they retreating? I truly believe that the most southern hex cannot be taken. This hex is with in 3 hex of where allot of you aux units are. Easy to take right? Wrong, impossible to take. This hex is guarded by 1x 7-range 21cm, 1x 6-range 15cm, 1x 4-range 10cm, 2x nebelwerfer, and 2 god damn SPART - 7 arties!!!!!!!!!!!!! - how the hell should I be able to take that with Inf only??????, I cant deploy any of my core units there.
Ok - it went like this:
In the North. I deployed all core units in the north (only place you can deploy). 2 turns of hitting and I was though to the northern middle victory hex. By turn 4 I had taken it. I went north with 2 tanks, to try a deal with those arties. 3 turns more, no breakthrough in sight for the 2 other northern victory hexes. My arty was all out of ammo. Down to 60% strength. The Germans received MORE arties by the southern of the northern victory hexes. In came a Me-109G9 or something, that was so strong that 2 hurricane and 2 spitfire, INCLUDING my 1200 experience point spitfire could not take half its strength in 1 turn!!!!!!!!!!!!. 2 turns more, still no breakthrough. Down to under 50% attack strength. The Germans receive more reinforcements. In comes a 900 point Pz IVF2 - after that was finish, my attacking strength of my tanks was around 30%. One turn more, I give up in the north, and redraws everything. I had not even begun my attack on the other 2 northern hexes (several 88AT there). The aux units take up the rear in the redrawl. Lost several of them. The AI buys a Sturer Emil (HA of 28), and does havoc on the aux units.
In the middle. I attack 2 turns, which gets me nowhere. The aux units are too weak. Redeployed 3 core Inf, 2 aux and a core arty form the north. This did it. 3 more turns and I had it. Lost 40% strength on all ground units except arties. I had to bate the 2 seven range art with aux Inf, to get it to run out of ammo, before I could attack them. In came a German SPArty, and did more damage. Got to close to a 7.5AT with a aux Grant tank. It shot a 8 strength Grant dead the next turn. Redeployed everything to the south the next turn to help down there.
In the South. headed forward with a Inf - dead!!!. Shot to pieces by seven arty. 3 aux Churchill's and a SParty are assigned the task of destroying those 2 long range arty. Any attack on the victory hex are impossible before they are gone. The SParty cant keep up. Before they ever reach there target they are down to 40% strength, hit by every possible thing you can dream of. One of the Churchill's actual reaches the arties, but are to weak to do anything. In comes the southern forces, but get caught in German reinforcement and the minefield. Uses several turns to defend my self. Another several turns to get in place. Now the windows of opportunity is missed, as I am already redrawing in the north.
Conclusion: You are too weak, and have to little time. This cannot be done with the forces available. You have no prestige point to give replacement to anything. You are outnumbered 2 to 1, you are outgunned a trillion to 1. Don't get me wrong I LIKE very hard scenarios, but I want a chance. The chance of winning here is 1 to a million. I don't mind losing, but if you lose here (or a TV) you lose the campaign, so you have to push it for a V or BV. Sad sad ending to a very good campaign.
By my 2 loses in this campaign I missed Operation Supercharge and Mersa Matruh. Operation Supercharge comes after Lightfoot, but I doubt someone will ever see it!!
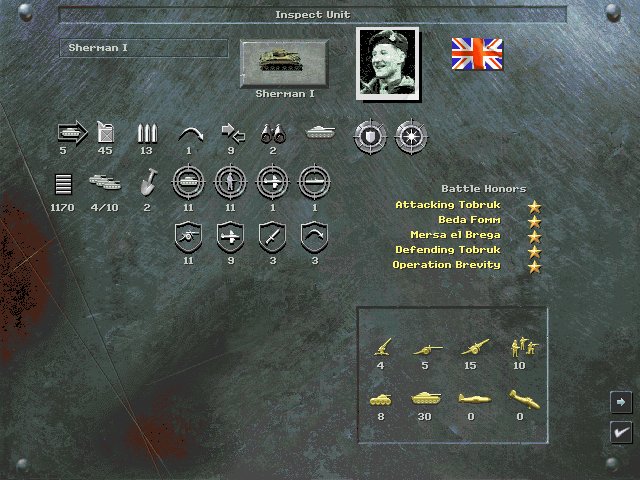
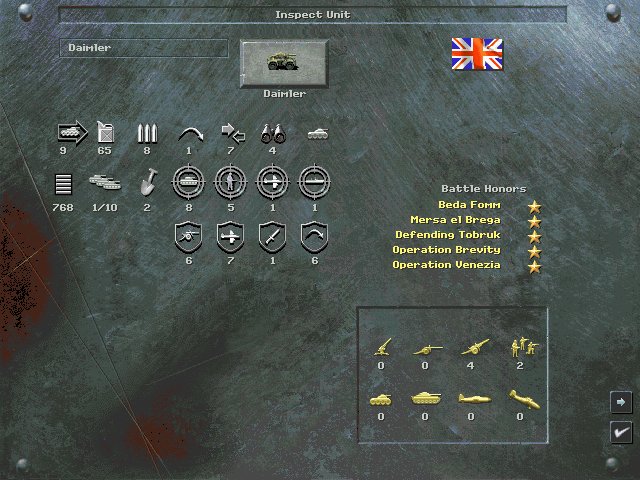
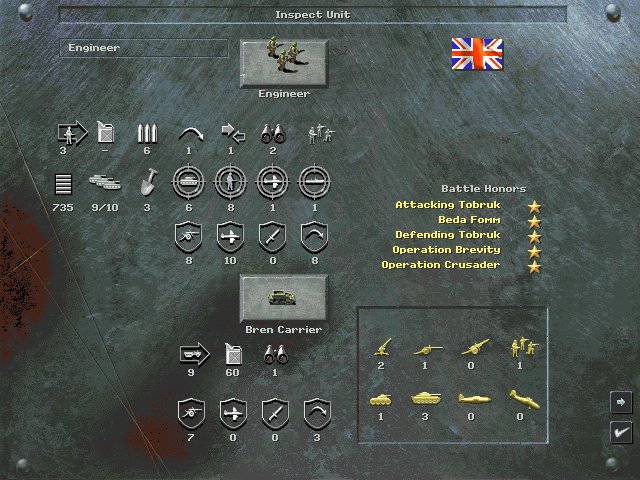
I ended up with 5 tanks (1x Valantine VIII, 3x Sherman I 1x AVRE), 5 Arty (11x 5.5Inch), 2 Recon (2x Daimler), 2 AA (2x 3.7inch), 4 Inf (3x Engerie 1x Paratyrooper), 1 Fighters (1x Spitfire VB).
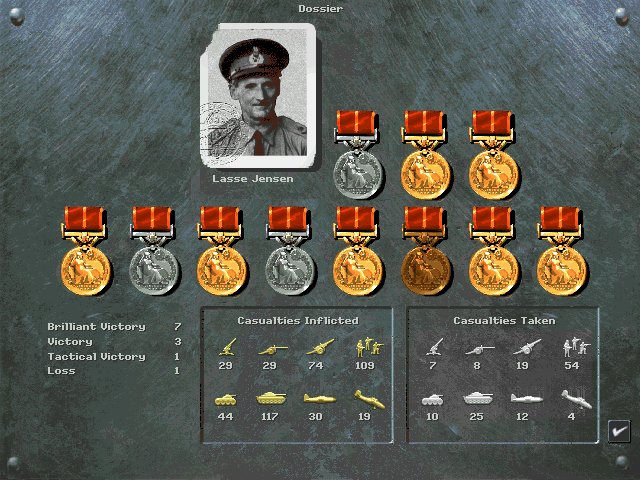
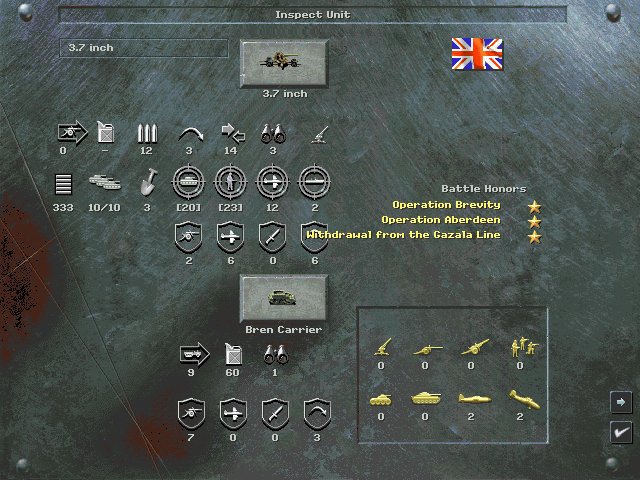
Best units
Note: My dossier are shown with a loss missing (operation Lightfoot), because when you lose a campaign the dossier is not recorded.
 |
 |
 |
 |
 |
 |
 |
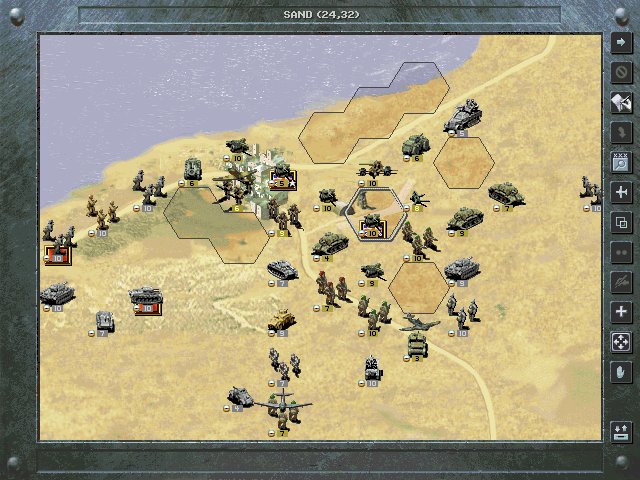
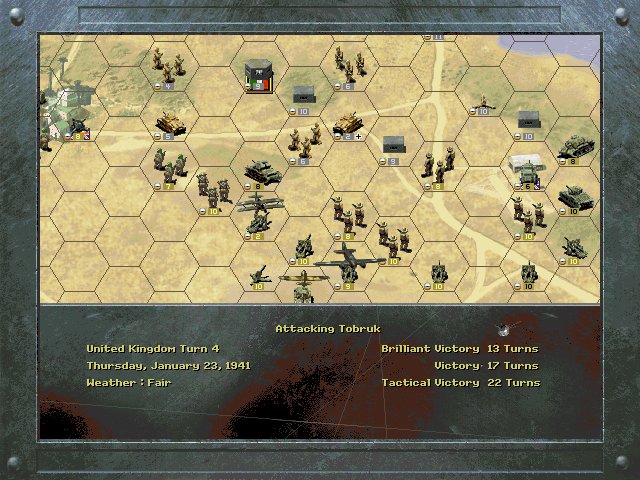
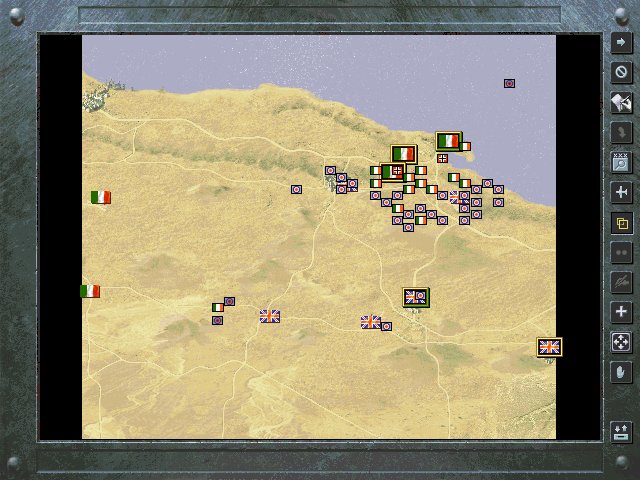
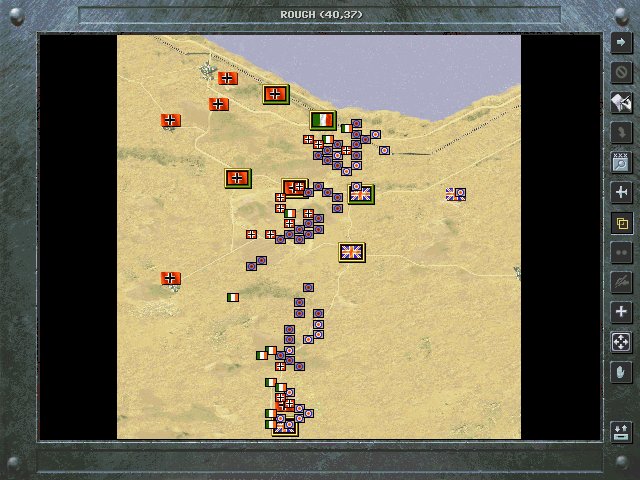
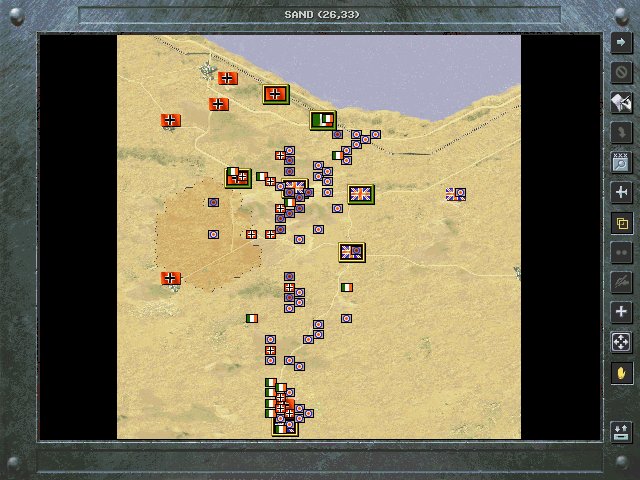
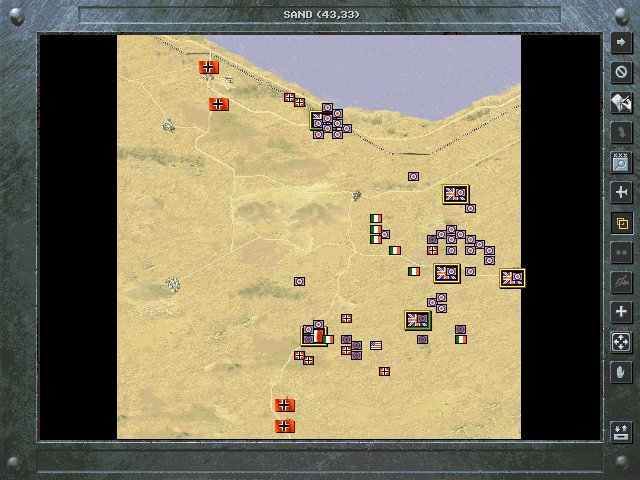
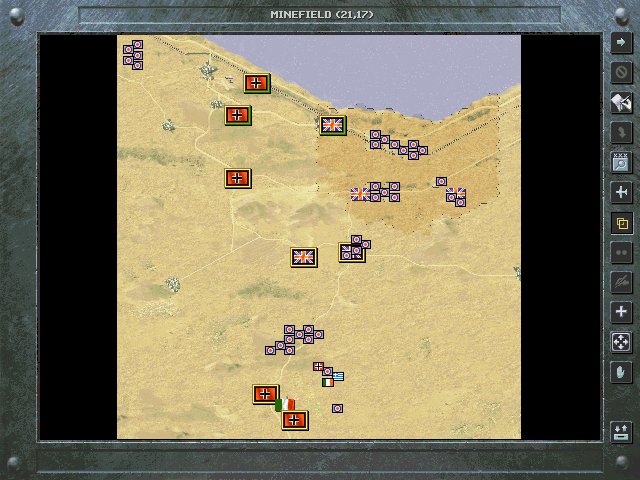
| Screenshots from the Battlefield. |
Battlefield screenshots. (see describing text)
 |
 |
 |
 |
 |
 |
 |