| |||||||||||||||||||||||||||||

|
Seaside Town
Seaside Town Go in the many stores around town and you'll have a feel for what this town's problems might be, but they're deeper than just some loony townsfolk... Don't forget to check the suspicious storage shack west of town. Try peeking in the windows to see what might be inside. Once you�re as satisfied as you can, go to the Northern part of the town and enter the elder's house. He seems to be the only sane person in town, but is still a bit off his rocker. He will tell you he needs the star that fell into the ocean nearby for a certain use. Who knows, maybe he knows what's wrong with the townsfolk and can save them? Go upstairs and talk to the only normal person in town: a frog from Tadpole Pond. From him buy the Exp. Booster (You should have enough; if not, go to Midas River and go through that until you have enough.) Having that will be useful in the days ahead. Once you've got that, leave town and head for the Sea.
Sea Equip the items to their owners, and give Bowser some Works Pants instead of the Happy Shell. Also give Toadstool the Exp. Booster. The Shaman will tell you some interesting (but unnerving) info when you shop. Once he's done, go through the door behind his desk and save. Then go back and go through the other door. Make your way along to the treasure chest, and open it. Then start kicking the starfish around in the room, then rush to the next one. You may get a few level ups from all this. If you didn't go onto the next room, do so. Avoid the starfish, and go through the room. However, don't go through the door just yet. See the hole in the wall in the north corner? Go through it. Jump up to the above area, and grab the back two boxes first, then the other one. Leave this room and then go through the door just across the area. In this room, jump into the water and make your way over to the whirlpool. Go strait up and walk along the wall until you go through a nearly invisible door. Get in the center of the light beam, and you'll surface. When your up above, jump out of the water and grab the box. Guard this item with your life. Go through the door to your lower left and you'll be on the beach. Get underwater with the whirlpools, and make your way to the ship. Jump up the mast and use the crow's nest like a pipe, and make your way into the Sunken Ship.
Sunken Ship See the hole in the crates against the wall? Drop down it for a flower. Before rushing down the stairs, watch the patterns of the mice, then imitate them to get down without a hitch. Once at the bottom, jump on the crates to grab the coin box. Move on to the next room. Run past every door and ghost, and enter the door at the end of the hallway. Drop down, but don't go for the chest. Instead, pass by the Shaman and exit the door. Go in the first door on the left, battling to get in. Once inside, follow the coin until the end, but don't get the lead one, or you'll have to leave and start over. Same goes for not getting them all. The prize for finishing this is good: 200 or so coins! Once that's done continue through the hall until the last door. (Not the one on the left wall, but at the end of the hall). Battle that ghost and go through. In this room, go to your right and jump on the discolored barrel. It will drop down, and be perfectly aligned with the two buttons. Roll it by jumping on it while facing the opposite way you want to go until it pushes the button. Then jump on the other button. Grab the mushroom, then save. Go in the door you can through moments ago, and head strait back down the hall and enter the room with the shaman. Switch Geno for Mallow, and attack the skeleton. Do the battle simply by doing this, attacking a Greaper with Mario. Then attack the Reacher with Bowser, and then do an all-attacking Thunderbolt with Mallow. If all went right and nobody was scared (Deathsickle done on them), just a Greaper should be left. Destroy it and you'll get a crud load of experience. Better yet...you can do this battle over and over and over and over and over and over and....you get the idea. Do this battle exactly like that, running back to that barrel rolling thing (and doing it) whenever you get weak or down low on FP. Do this until Princess learns (she should have Exp. Share, which will make it go faster) Come Back. With come back in hand, switch Bowser back out of your team and put Geno in his place. Your team should now consist of Mario, Geno, and Mallow. Give the Amulet to Mallow to boost him up a bit. Go back to the room with the Barrel, do it once more, and save. Then go into the next room and enter the Password "Pearls" into the blocks. Make sure you put the P in block 1, E in 2, yadda yadda yadda.... Go through the door that opens, and prepare for battle.
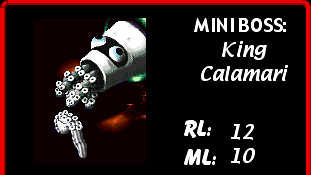
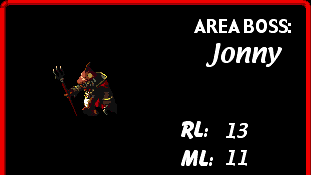
Go through the door between the cannons. Leap up on the crates and reach the upper door, and go through. In this room watch the pattern of firings and go when it's safe. When you reach halfway, wait again and run when it's safe to reach the other door. If you fall, simply leave to your lower left. Once again, view the pattern of the mice and mimic them to get down safely. In this room, go past the boxes by leaping over the mouse on the left. To get the chests on top of the pile of crates, jump on the barrels in the corner and run-jump over to them. Go through the door and don't talk to the clone of Mario. In the middle of the middle beam of light, next to the wall, is a hidden box. Once it appears, the treasure box appears too high to jump. Run and jump onto your clone, then jump again (underneath, of course!) to grab the KeroKero Cola inside. Leave the room then go in the door on the right (Mario's). Then go down the stairs. Don't get the ? box quite yet; instead, save and grab the other one. But first, equip the Jump Shoes (if there not already) to Mario, and you'll soon see why. The chest is of the same breed as the Pandorite you saw earlier. Use the Super Jump on him, and you should be able to beat him, provided you don't loose (hence the save point). The prize is a Safety Badge, which protects you from all status changes. Open that other treasure box to replenish your depleted HP. Save once again, and enter the door in the NE wall. Go back and grab the coins now in that enemy box, and equip Mario with the Safety Badge. Enter the door again, and go strait past the pond with the fish, and enter the next door. In this room, jump into the water and down the whirlpool. Make your way to the NE door. Make your way down the stairs to the door at the bottom. I suggest jump down the stairs to avoid the Starfish guarding it. In the next room, move along the NW wall and behind the boxes. When you stop moving walk around in that area and you'll enter a door. You'll get a Safety Ring in this mysteriously dry room...Equip to Toadstool; and give the Amulet to Mallow. Go back and make your way around the boxes. The walk over to the barrels on the right, and jump up them until you surface. Go to the floating barrels off to the left and receive the Frog Coin, then return to the right and enter the door. You will have finally reached the area of Jonny Jones, the pirate of the Mario Seas. His latchkeys will greet you in the receiving bay...with open spears. Take them out with a few swings from Mallow's thunderbolt and Mario's Smasher. Pass up the box for now, going up the stairs. After you get past the trap set for you, continue upstairs and meet the last line of defense: two more troops. Take them out, and go back downstairs to the box. It contains a mushroom. Then do any switch-a-roos and make sure your team consists of Mario, Toadstool, and Mallow. Go back upstairs and through the door to meet the boss of this area:
Go through the door on the right & use the tramp to get back to the map.
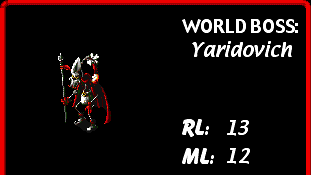
Seaside Town Yaridovich will run off to meet his ride off to the NW. First, go to the Inn and save. If you don't have Mallow, Toadstool, and Mario in your team still, get them into it. Go to the NW shore where you'll find Yardovich waiting for his ride. After a few moments, he reveals his true form and the battle starts.
| ||||||||||||||||||||||||||||
|
Secrets of the Seven Stars v7.5 is © 2000-2006 Jason Kemp. Super Mario RPG: Legend of the Seven Stars is © 1996 Nintendo and Square. Paper Mario is © 2001 Nintendo and Intelligent Systems. Mario & Luigi is © 2003 Nintendo and ALPHADREAM. Super Nintendo, Nintendo 64, Game Boy Advance, and Nintendo Power are © Nintendo. All other names/titles are © their respective owners. No money has been made from this site. Qeomash and SOTSS have no affiliation with Nintendo or any other mentioned company. Before using any content from this site, please ask first and then give credit. (I almost always say yes.) | |||||||||||||||||||||||||||||