| |||||||||||||||||||||||||||||||||||||||||||||||||||||||||||||||||

|
Nimbus Land
Seaside Town Shopping wise, this town is the best. go to the middle door on the left strip mall and talk to the kid in pink. Buy a Troopa Shell, Parasol, Double Punch, and Ribbit Stick. And, if you ever want some retro weapons, grab the ones in this store! Equip those weapons to their holders, then sell any weapons and armor (save the accessories) you're not using at the moment. Now, go to the middle store on the other strip mall. Talk to him and give him any regular mushrooms you have. If you're lucky, you'll get some Rock Candies in return! Once you're done with him, go see the REAL elder in his house. He will tell you about a town that may have the 6th star. Switch Mallow out of your team and put Geno in his place. Give Geno the Amulet. Following this lead, head for the next area.
Land's End Jump over the small bluff the cannons in and jump around in the area after that until you find a yellow block. Fire onto that block, then jump to the hill. In the same line as the cannon, get next to the hole in the ground and jump to reveal another block. Go back in the cannon and shoot as far as you can. You will land on that second block, allowing you access to the moving chest. Then leap over to the ground above. Or, if you have to, refire from the cannon and then jump onto it. Jump in the westernmost point on the top to get a chest. Drop back down and go through the path on the right. Get on the second bump and wait. Wait for the Geckit on the next one to fall. As soon as he does, run and jump against the North edge of the map and hopefully you will get to the end before any Geckits get to you. Run along that top row to get to the next area. Hit the save point, and then go to the right. Jump on one of the two flowers that area against the edge of the map and then run-jump to the other one. You should get a frog coin in the middle of them. Then run over to the spiny flower. Jump up to the next platform, get on the flower, jump to the next platform, yadda yadda yadda. Watch out for the attacking bees! Go through the path at the top. You can talk to the Shaman to find out about the Sky Bridge, or you can simply jump across it for free. Take the free route. Go through the path to the desert. Talk to the mouse next to you and he'll tell you he's from your destination...Monstro Town. He will then tell you to follow the Ants in the sand. Make sure Geno's in your team with Geno Whirl, if not, just battle some enemies around the area until you do. Then, go into the whirlpool in this area after using the save point. Simply run into the ant in the whirlpool and then go down it once you can. To easily win the battle, use Geno Whirl's 9999 HP Trick. Once you're through with all the ants, you'll drop down into the underground part of the desert. Now...you'll probably think I'm crazy, but I want you to remove ALL armor and weapons and accessories from your fighting three. Equip someone in your team (fighter or not) with the Exp. Booster and hit the save point (Do NOT skip the save!!). Also, make sure you have more than 400 coins. If you don't, go back up to the surface and jump on a few of the shoguns (you won't battle them) to get enough. Then, jump down and grab that box floating below, and start to run along, knocking away enemies as fast as you can! You will get a crud load of experience from this. Once you fall down the hole at the end, jump behind the crates and talk to the person behind the crates and buy the star. Then attack and destroy the Geckits in a systematic attack. Then proceed into the next area...
Belome Temple
Once you do...you'll be shot back to that last save point you used. With the star still below....and all the experience points you earned form your last onslaught with the pair of stars. I had you remove armor/weapons so Belome would defeat you easily. Do the same procedure again and again until everyone has learned these attacks: Ultra Flame (Mario), Geno Blast (Geno), Star Rain (Mallow), Psyc Bomb (Toadstool), and Bowser Crush (Bowser). Use the Exp. Booster strategically to make sure that everyone gets the attack they need quickly. Then, reequip the equipment to your fighting team, making sure Toadstool has the Safety Ring, Mario with Safety Badge, and put a Wake Up Pin on Geno. Proceed through the star onslaught one last time...but this time, do the battle differently.
Go on through the door again (no water comes out this time), and make your way through the pipe and to you destination to retrieve the star.
Monstro Town With that out of the way, you can go visit the city some more. The next house contains a fellow who counts the number of jumps you do with Super Jump. Try to get 30 or more, which is pretty difficult! (I've only done it once.) Did you notice that key outside? If you didn't, go outside and look on the ledge. To get it down, talk to the twomp 7 times. The sealed door next to the Thwomp house contains the most difficult boss in the game...Culex. Go into the store and buy a "Spike Chomp" and equip it to Bowser. Work Pants are still a better defense item for Bowser. Leave the store and go use the save block (the hole in the ground). Go through the last door and jump around in this area for another hidden box. 11 left! Go back to the city and use the trampoline to reenter Belome Temple--it's the fastest way back. Get to the yellow elevator and check the Belome Statue until it says "Past my Bedtime" again, then go back down and give the gold Belome the Temple Key you got in Monstro. Once you've raided the treasury, get back to the desert and go through the path to the Cliff. (Use the star box as a stepping-stone if you need it.) If you want, you can do this ride as fast as you can to get a good item--the Troopa Pin. Or, just leisurely ride the Koopas to the top. I'll do the Troopa Pin way because I can do it pretty fast. To avoid getting frustrated, beginners should try doing it slowly just to get past. Once you reach the top, head on to Bean Valley.
Bean Valley
Read the note that drifts down after battle and take the seed, then drop down the now open pipe. Whack the brick block to make a vine sprout out. Hit the block once more to climb. Get past the single guard and begin a climb up the vine. Jump to the next one, and then the next one. In this area, you are left with a decision: hard and rewarding or easy and fruitless. For the easy way: just make your way up the vines. Hard, the explanation is below. In the second area, make your way to the top of the blue vine (like the one you see to the left). If you want hard, get over to the orange vine. Easy, take green. Getting over to the orange can be difficult, and just remember the vines are all aligned in a row. :::Easy::: From the blue vine get to the green and climb up. Get to the top of the red, then jump onto the orange. Jump on top of the enemy floating below and defeat him to reveal a yellow block. Jump onto the green then the blue, climb to the top, and then hit the smiling tramp to get to Nimbus Land. :::Hard::: Get to the top of the red in the next area and jump to the orange. Jump strait up to reveal a yellow block. Get back over to the top of the red and jump to the block, then over to the green. You have now completed the path grab the chests, then drop down the hole. Hit the trampoline to reach Nimbus Land. Then, hit the smile tramp to get to the main area.
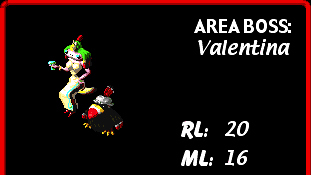
Nimbus Land Go in the store nearby and buy the following items: Mega Glove, War Fan, Hand Cannon, Sticky Glove, Fuzzy Shirt, Fuzzy Pants, Fuzzy Cape, and Fuzzy Dress. Equip them to their owners, then jump onto the boxes in back. Also, you may want to give the Exp. Booster to someone else (nobody in your fighting team, though!) Get on the northernmost box, and run and jump strait downwards to reveal another hidden chest. Go get some shuteye at the inn, then head back outside. Go in the northernmost house (the one that is attached to the castle) and see if any of the statues bear any resemblance to anyone.... After Mallow's true identity is revealed, go along with Garro's plot and you'll get inside of the castle. After Dodo puts you in the proper place, leave out the door and hit the save. Then attempt to leave the room--but Valentina is standing outside! Dodo will soon come inside and begin to "polish" the statues. Try not to get pecked! If you win, you get a feather. If you loose, you battle the bird. Once you're done, go out and retrieve the feather if you got one and then use the save. Go through the door and then jump onto the empty pedestal. The two guards unwittingly dedisguise you so that you look and act normally. But that also means you must now battle every guard you come upon. Start by going through the NE door. Battle your way through this hallway room. Avoid the Birdy statue, for it is actually a real Birdy! Hit the box and then go through the NE door. Get to the Northernmost door and go through it, but don't forget the treasure box! Get past the Shamen and and reach the far door. Get down the stairs in the next room and battle the Jawful. Then, jump around in that area for a hidden box. Then run along the SW wall until you walk off into blackness. When you stop moving, go NW until you stop, then jump. Follow the SE path and into the next room. Talk to all the prisoners, then save. (Don't forget to get the key from the guard). After that, head back to the main room with 3 doors. Attack and destroy the Heavy Troopa guarding the door. Unlock the door, then go through. Use Group Hug and then the Flower Box you received from one of the prisoners. Then talk to the egg.
Get past the fan and attack the Forkies. Jump onto the floating ? block to your right and jump. Go into the door to the NE. Run over and read the note next to the door. After the short showing of the movie about Mallow's parents, follow the ShyAway. Attack and destroy the Heavy Troopa, then go through the door. After Valentina makes a getaway, give chase! Remember to hit the save point on your way through. Get past the guards and go through the door. In the next room, jump under the treasure box to reveal a block. Jump onto it to grab the Star inside the box. Sprint to the next door and thwack Dodo out of the hallway with the Star. Continue to run along through the next door. When you finally land, hit the trampoline and then hit the one with the Pow on it to return to the map. Go somewhere and stay at an inn to recover your HP for the upcoming battle. Then return to Nimbus Land and jump on the =) trampoline. The people of Nimbus Land, after being told of Valentina's treachery by Garro, corner her and stall her as she attempts to return to the castle.
Once Mallow quits crying and has you come in, you finally meet Mallow's parents! Everyone will be introduced to them, and at long last, you'll get a definite clue as to where the next star piece is: Barrel Volcano. After they finish talking to you, go back out the doorway to the SW. Proceed like you did coming in the first time, but go in the door off to the left that was locked once before. Talk to the man in there. He's that guard that gave you the key earlier. After Mallow makes an appearance, he will give you a Flower Jar. Use it. Go back to the room with 3 doors, and go back up into the Northernmost corner and jump. A hidden box appears where the once visible one was. Go in the path nearby and follow it to the 4 paths area again. Go SW to the entry room and then exit the castle and you'll be back outside. Go strait right around the castle, and enter that house. Scare Croco half to death, and then pick up the Signal Ring as he drops as he rushes out. With that equipped to one of your fighting 3, there will be a chime when an unopened hidden chest is in that room. From that house, go against the edge of the clouds and move slowly southward (pushing against the cloud edge) until you walk off into thin air! Continue along the path until you find the Shy Away. He will give you the fertilizer you need for the strongest Weapon and Armor in the game. Go back and drop down the hole and head outta town.
Rose Town
Monstro Town
Nimbus Land
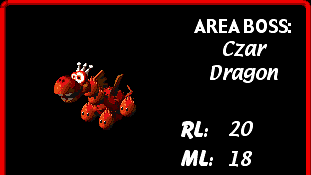
Go into the next room and look for stepping-stones on the lava to the south. Use them to get across to another room that contains two flowers. Go back and make your way across again. Go up the natural stairs and the switch Geno out of your team and put Mallow backing. And give Mallow the Safety Badge off of Geno. Mallow's "Snowy" attack will come in quite hand in this place, don't ya think? Go through the archway, then make your way up this small area to the top. Go through the path and hit the ? box to receive a star a coin. Take the next box, then proceed onwards. Hit this treasure box and then start to sprint--it contains an invincibility star. Make your way along then go through the archway after the rather large enemy. Get past the skeletons--don't battle them, it's pointless. Avoid the fireball and pass up the doomed Frog Coin in the lava (why hasn't it melted yet--?) and make your way to the path to the next area. Get pas the three leapin' fireballs (these are Pyrospheres), and go through the arch to the next area. Then go back and jump into the lava and you'll fall onto the top of the arch so you can retrieve the Frog Coin above. Get past the Vomer skeletons, and then the spikeys. Go past the stump and enter the next area. Go up and hit the save and grab the chests. Move on and avoid the stump by going to the North of it against the wall. Continue on until you reach the arch--and then proceed through. Continue up to the top while avoiding the enemies. In the next room, attack the gigantic Corkpedite. Concentrate on the body, not the head. Go through the archway he was blocking and switch Geno back into your team for a moment. No need to switch accessories or anything, he'll only be there for a moment. Attack the stump North of you and use Geno Whirl's 9999 HP trick to take him out quickly. Switch Mallow back in, then go SE from the Stump's area then NE to the exit. Go up the short cliff and talk to the man blocking the pathway. In Hinopio's shop, take a snooze at the middle counter, and at the far right buy Fire Shirt, Fire Pants, Fire Cape, and a Fire Shell. Pass up the dress because Toadstool will be wearing the invincible Lazy Shell until the end of time. Go out the other door when you're done with Hinopio, and hit the save point. Go through the path to the NE, then trudge lightly across the doughnut lifts so they don't fall. Once across, follow the path to the next room...where you'll meet the dreaded Czar Dragon (personally, I think he looks like a burning Barney).
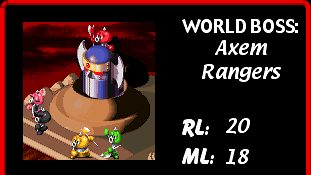
There now emerges a bridge across the lava pits that the Czar guarded. In the next room is the star you seek--but you ain't getting off that easily without Smithy sticking' his nose in on things. The Axem rangers emerge from thin air to steal the star away--hopefully to take it back to Smithy. Follow them to the next room. Once they make off with it again, give chase through the one lane hallway to the surface of the volcano. (If you get lost in this area, I wonder how you got this far...) Eventually, there will be a trampoline to take you back to the top. Use it and you'll be greeted by the rangers and their flying hulk (and the ride that was supposed to pick up Yarid long ago). Soon they'll board the massive ax and prepare to fly off towards Bowser's Keep. But, of course, you'll jump on and take them out.
With 6 stars retrieved, you only have one to go. And there's only one place left to look: Bowser's Keep. | ||||||||||||||||||||||||||||||||||||||||||||||||||||||||||||||||
|
Secrets of the Seven Stars v7.5 is © 2000-2006 Jason Kemp. Super Mario RPG: Legend of the Seven Stars is © 1996 Nintendo and Square. Paper Mario is © 2001 Nintendo and Intelligent Systems. Mario & Luigi is © 2003 Nintendo and ALPHADREAM. Super Nintendo, Nintendo 64, Game Boy Advance, and Nintendo Power are © Nintendo. All other names/titles are © their respective owners. No money has been made from this site. Qeomash and SOTSS have no affiliation with Nintendo or any other mentioned company. Before using any content from this site, please ask first and then give credit. (I almost always say yes.) | |||||||||||||||||||||||||||||||||||||||||||||||||||||||||||||||||


